Lorex cameras help you watch your home or business. They are easy to use. This guide helps you understand how to use Lorex camera software on your PC. Let’s start with the basics.

What is Lorex Camera Software?
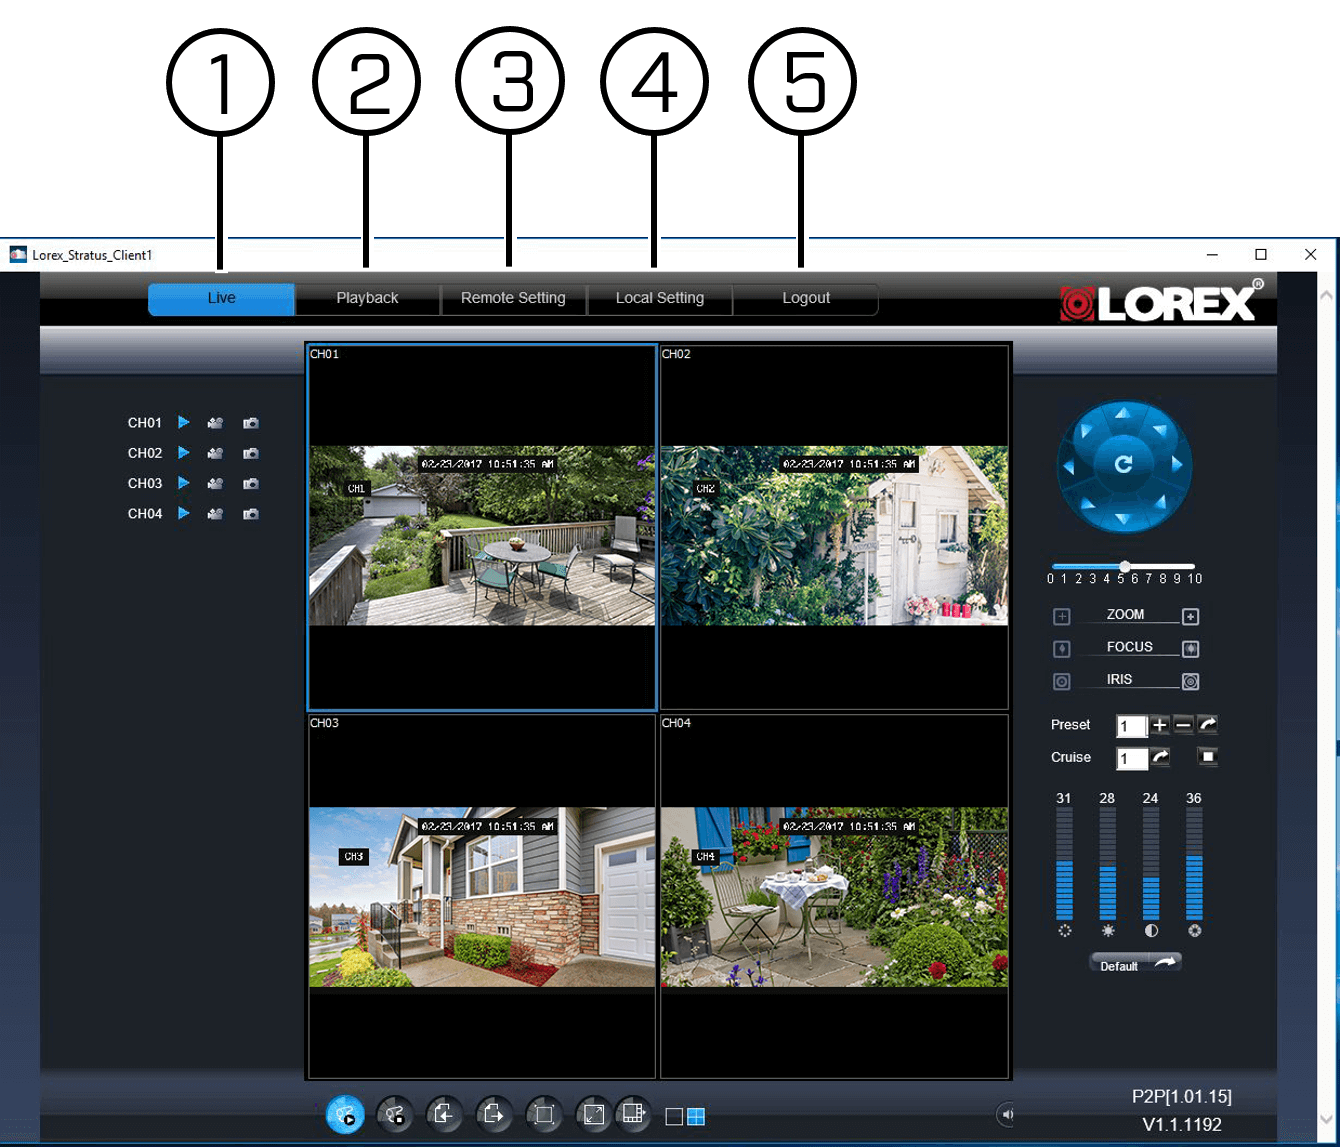
Lorex camera software allows you to control your cameras. You can view live video. You can also record video. The software makes it easy to manage your camera settings. You can see your camera footage on your PC.
System Requirements
Before installing the software, check your PC. Here are the basic requirements:
- Windows 7 or later
- At least 4GB RAM
- 1GB free disk space
- Internet connection for updates
Downloading the Lorex Software
Follow these steps to download the software:
- Go to the Lorex website.
- Find the Support section.
- Look for the software download link.
- Select the software for your camera model.
- Click the download button.
Installing the Software
Once you download the software, install it on your PC. Here’s how:
- Locate the downloaded file.
- Double-click the file to open it.
- Follow the installation prompts.
- Accept the terms and conditions.
- Click “Install.”
Connecting Your Camera
After you install the software, connect your camera. Here are the steps:
- Connect your camera to the same network as your PC.
- Open the Lorex software on your PC.
- Click on “Add Device.”
- Enter your camera’s IP address.
- Enter your camera’s username and password.
- Click “OK” or “Add.”
Viewing Live Video
Now you can see live video from your camera. To do this:
- Open the Lorex software.
- Click on the camera you added.
- Select “Live View.”
- You should see the live camera feed.
Recording Video
You can also record video with the software. Here’s how:
- Go to the “Recording” tab.
- Select “Schedule” to set recording times.
- Choose the camera you want to record from.
- Click “Start Recording.”
Playback Recorded Video
To watch recorded video, follow these steps:
- Open the Lorex software.
- Go to the “Playback” tab.
- Select the date and time of the recording.
- Click “Play” to watch the video.
Adjusting Camera Settings
You can change camera settings in the software. Here’s how:
- Click on the camera in the software.
- Select “Settings.”
- Adjust the settings you want to change.
- Save your changes.
Troubleshooting Common Issues
If you have problems, try these solutions:
Camera Not Connecting
- Check if the camera is powered on.
- Ensure the camera is on the same network.
- Restart the camera and your PC.
Cannot See Live Video
- Check your internet connection.
- Make sure the camera is added in the software.
- Try refreshing the live view.
Frequently Asked Questions
How Do I Install Lorex Camera Software On My Pc?
To install Lorex camera software, download it from the official website. Follow the on-screen prompts to complete the installation.
What Are The System Requirements For Lorex Software?
Lorex software requires Windows 10 or later. Ensure you have at least 4GB RAM and sufficient storage space.
Can I Access Lorex Cameras Remotely?
Yes, you can access Lorex cameras remotely using the Lorex software. Make sure your camera is connected to the internet.
How Do I Connect My Lorex Camera To The Pc?
Connect your Lorex camera to the PC using a USB cable or through your network if it’s a Wi-Fi model.
Conclusion
Using Lorex camera software on your PC is easy. You can view live video and record footage. Follow the steps in this guide to set up your cameras.
Remember to check the system requirements first. Download and install the software. Then, connect your cameras and start using it. If you face issues, refer to the troubleshooting section.
Now you can keep an eye on what matters most. Enjoy your new Lorex camera system!