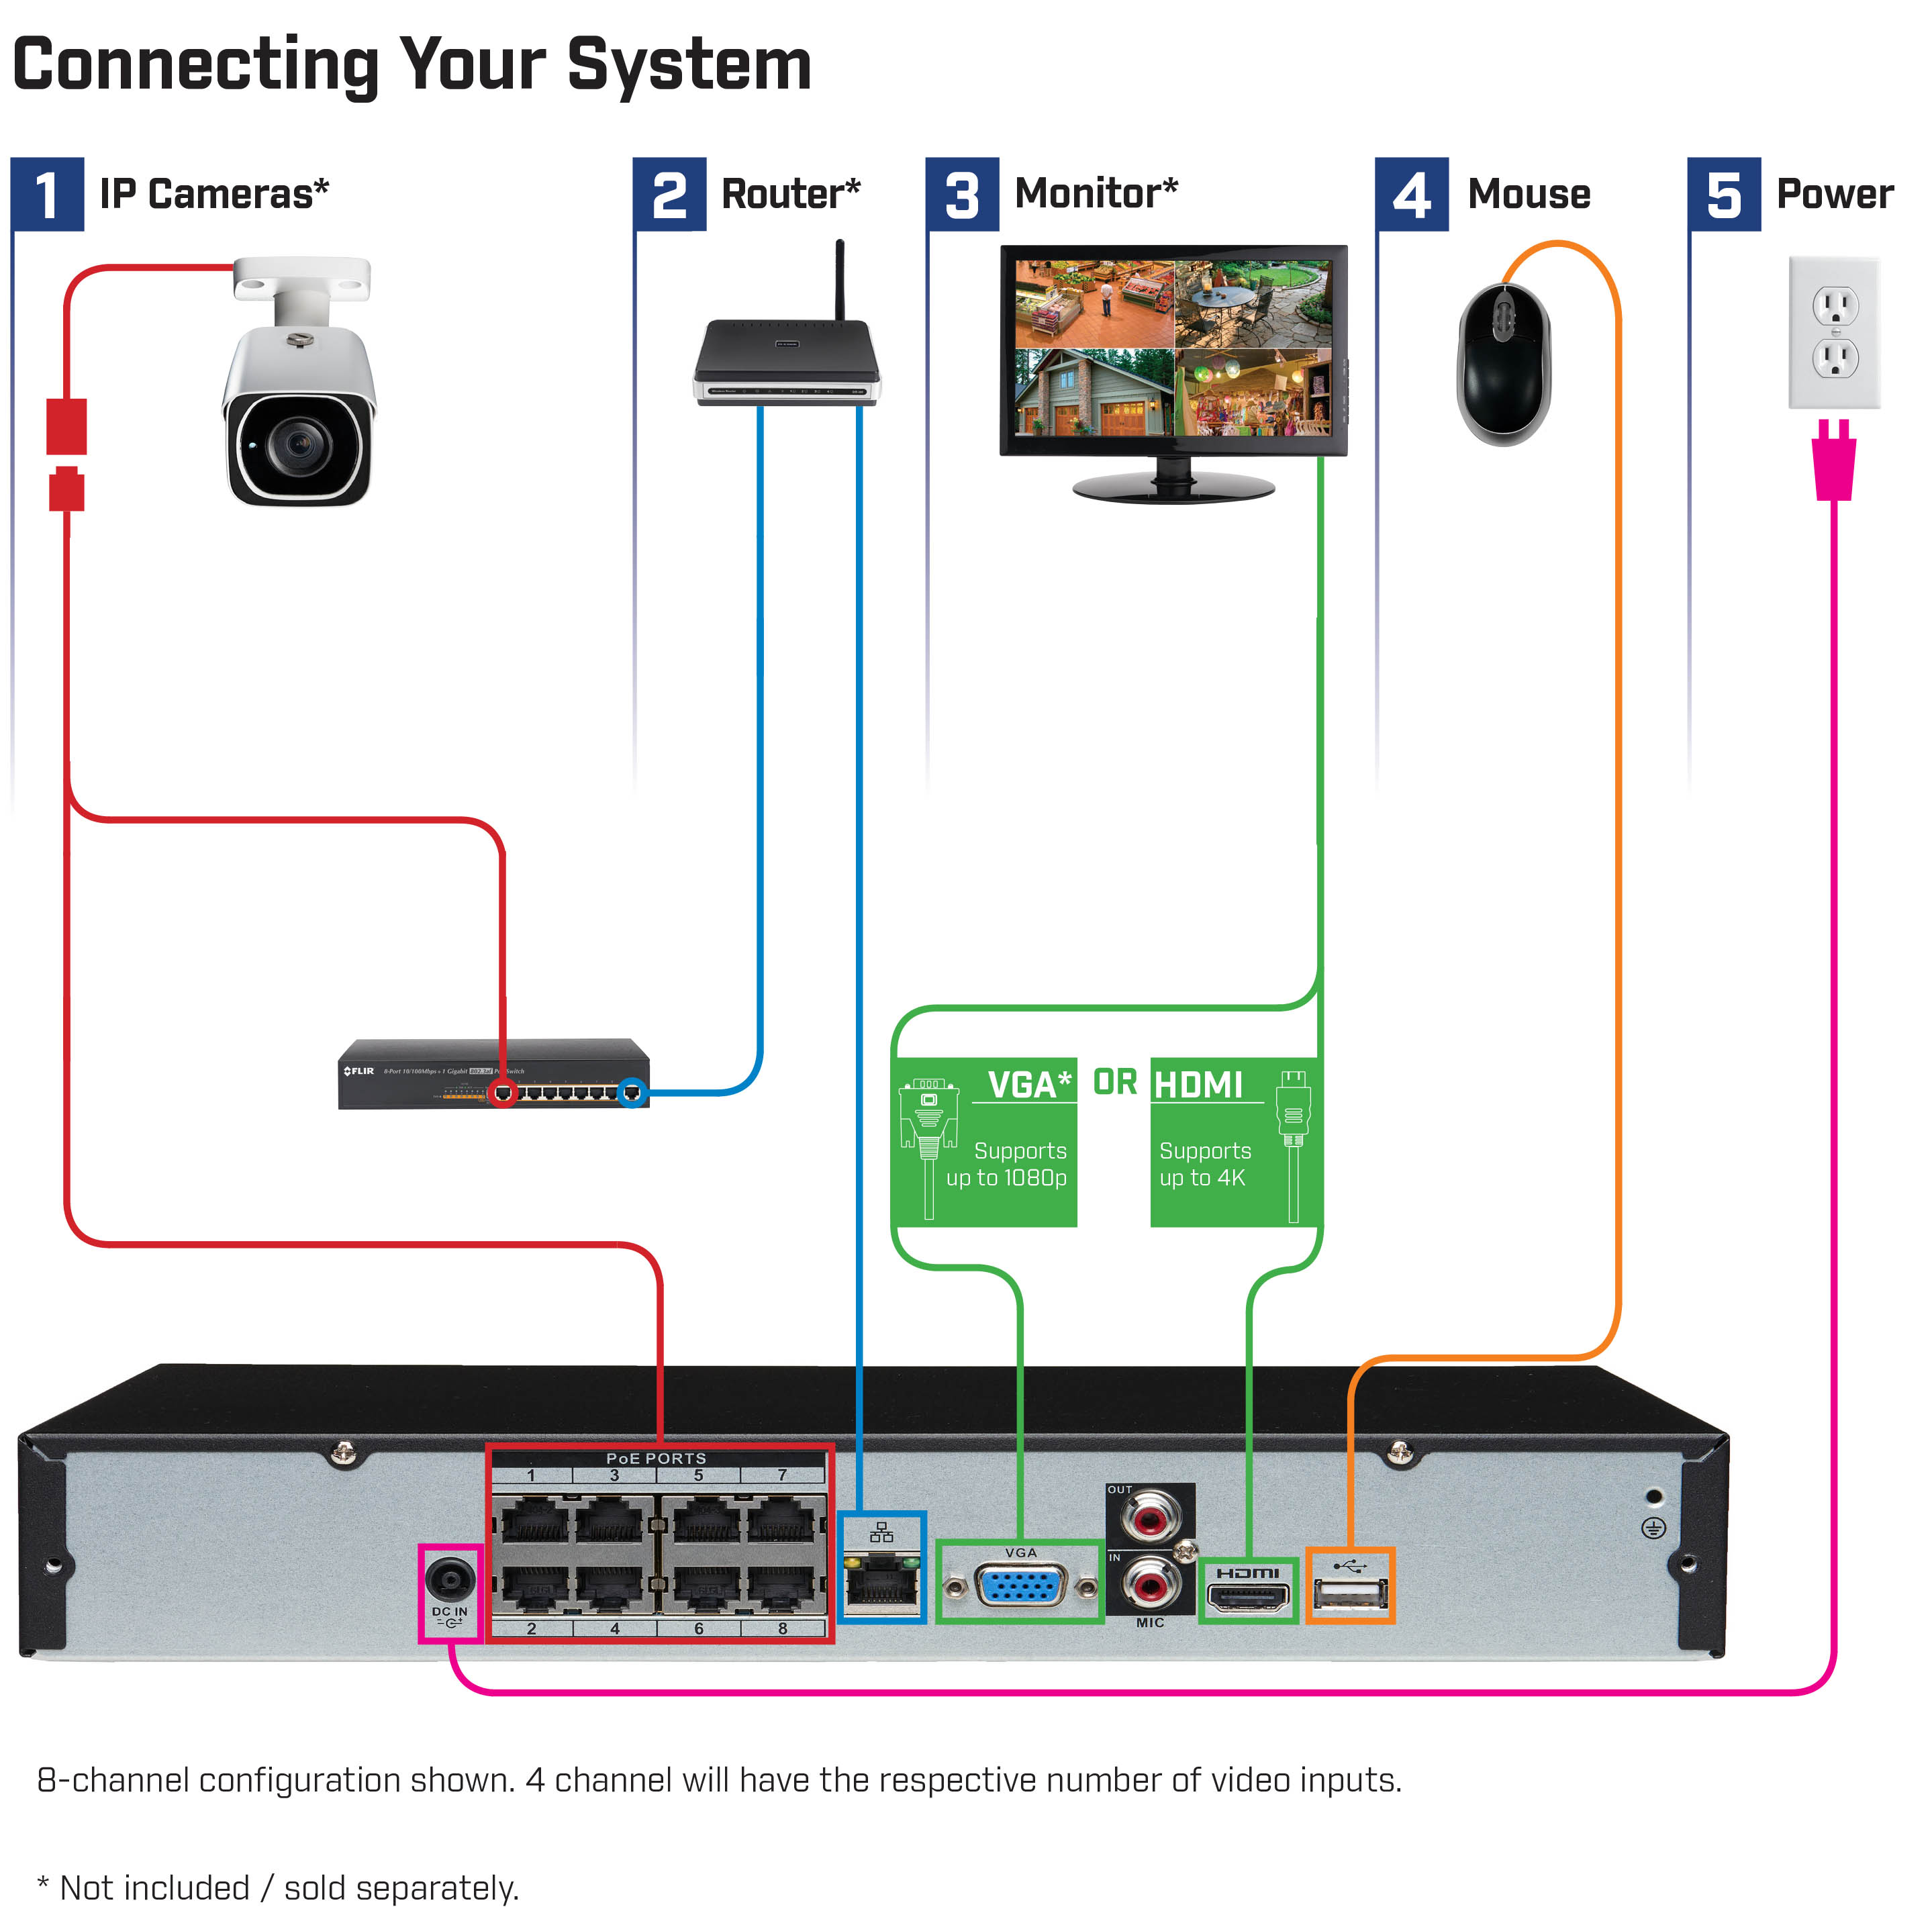
Setting up a Lorex camera is simple. You can do it in a few steps. This guide will help you. We will cover everything you need to know.
What is a Lorex Camera?
A Lorex camera is a security camera. It helps you see what happens around your home. These cameras can connect to your phone or computer. This way, you can watch live video from anywhere. Lorex cameras come in different types and models. You can choose one that fits your needs.
Things You Will Need
Before you start, gather these items:
- Lorex camera
- Power adapter
- Ethernet cable (for wired connection)
- Wi-Fi connection (for wireless setup)
- Smartphone or computer
- Internet connection
Step 1: Choose the Right Location
Select a good spot for your camera. Think about these points:
- High enough to avoid tampering
- A clear view of the area
- Close to a power source
- Good Wi-Fi signal, if using wireless
Step 2: Power Up Your Camera
Now, plug in the camera. Use the power adapter that comes with it. Make sure the camera is connected to a power source. If you use a wired camera, connect the Ethernet cable. This connects the camera to your router.
Step 3: Download the Lorex App
Next, download the Lorex app. You can find it in the App Store or Google Play. After downloading, open the app. Create an account if needed. This app helps you control your camera.
Step 4: Connect the Camera to Wi-Fi
Open the Lorex app. Follow these steps to connect your camera:
- Tap on “Add Device” in the app.
- Choose your camera model.
- Follow the prompts to connect to Wi-Fi.
- Enter your Wi-Fi password when asked.
Wait for the camera to connect. This may take a few moments.
Step 5: Adjust Camera Settings
Once connected, you can adjust the camera settings. Go to the settings menu in the app. Here, you can:
- Change the camera name
- Set motion detection alerts
- Adjust video quality
Make sure to save any changes you make.
Step 6: Test Your Camera
Now it’s time to test your camera. Open the app and view the live feed. Check the video quality. Make sure the camera sees the area you want to monitor. Adjust the angle if needed.
Step 7: Set Up Cloud Storage (Optional)
If you want to save videos, set up cloud storage. This allows you to store recordings online. Go to the storage settings in the app. Follow the steps to choose a plan. This way, you will not lose important footage.
Step 8: Secure Your Camera
To keep your camera safe, do a few things:
- Change the default password.
- Keep the firmware updated.
- Use strong passwords for your Wi-Fi.
This helps protect your camera from hackers.
Common Issues and Troubleshooting
Sometimes, things may not work perfectly. Here are some common problems and how to fix them:
Camera Won’t Connect To Wi-fi
Check your Wi-Fi signal. Make sure your password is correct. Restart the camera and try again.
Live Feed Is Not Clear
Adjust the camera angle. Ensure it is not blocked. You can also change the video quality in settings.
Motion Alerts Not Working
Check the motion detection settings. Make sure they are turned on. Adjust the sensitivity if needed.
Frequently Asked Questions
How Do I Connect My Lorex Camera To Wi-fi?
To connect your Lorex camera to Wi-Fi, use the Lorex app. Follow the on-screen instructions to select your network and enter your password.
What Is The First Step To Install A Lorex Camera?
Start by choosing a good location for your camera. Make sure it covers the area you want to monitor.
How Do I Reset My Lorex Camera?
Find the reset button on your camera. Press and hold it for about 10 seconds until the camera reboots.
Can I Access My Lorex Camera Remotely?
Yes, you can access your Lorex camera remotely through the Lorex app on your smartphone or tablet.
Conclusion
Setting up a Lorex camera is easy. With these steps, you can protect your home. Follow the guide, and you will have your camera ready in no time. Enjoy the peace of mind a Lorex camera brings!
Frequently Asked Questions
How Long Does It Take To Set Up A Lorex Camera?
It usually takes about 30 minutes.
Can I Use Lorex Cameras Outdoors?
Yes, many Lorex models are weatherproof.
Do I Need Special Tools For Setup?
No, just basic tools like a screwdriver may help.

Final Tips
Always read the manual that comes with your camera. This helps you understand specific features. Keep your app updated for the best performance. Regularly check your camera’s placement. Make sure it is still capturing the right areas.
Now you are ready to start. Enjoy your Lorex camera and feel safe.