Do you want to add a wireless camera to your Lorex DVR? This guide will help you do just that. Adding a wireless camera can help keep your home safe. You can check on things from anywhere. Let’s break it down step by step.
What You Need
Before you start, gather these items:
- Lorex DVR system
- Wireless camera
- Power source for the camera
- Internet connection
- Monitor or TV to view the feed
Step 1: Check Compatibility
Not all cameras work with every DVR. First, check if your wireless camera works with your Lorex DVR. Look for the model number on the camera and DVR. Visit the Lorex website for a list of compatible devices.
Step 2: Set Up the Wireless Camera
Once you have a compatible camera, it’s time to set it up:
- Find a good spot for the camera. It should cover the area you want to monitor.
- Make sure the camera is near a power source. It needs power to work.
- Plug in the camera and turn it on.
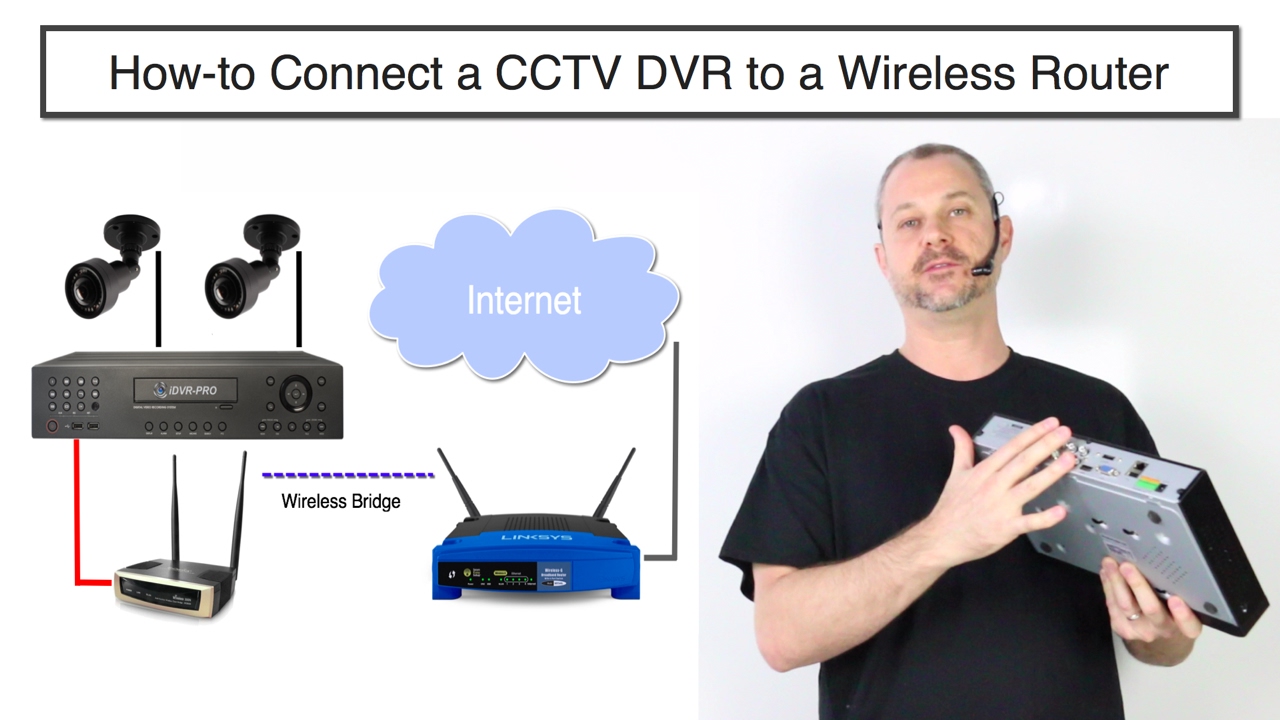
Step 3: Connect the Camera to Your Network
Your wireless camera needs to connect to your home network. Follow these steps:
- Open the app that came with the camera. You can find it on the camera’s manual.
- Follow the instructions to connect the camera to Wi-Fi. Make sure to enter the correct Wi-Fi password.
- Wait for the camera to connect. This may take a few minutes.
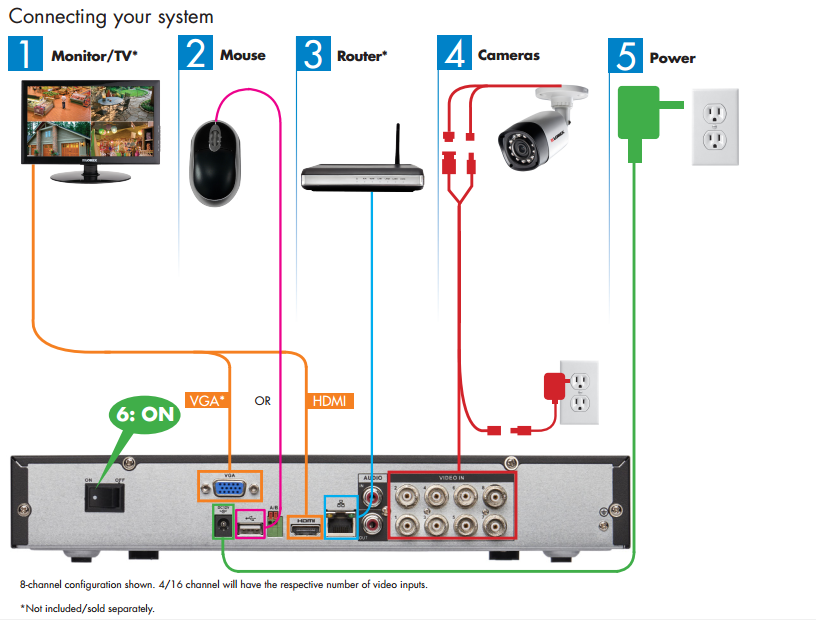
Step 4: Connect the Camera to the Lorex DVR
Now, you need to connect the camera to your Lorex DVR:
- Turn on your Lorex DVR.
- Use the remote or mouse to access the main menu.
- Look for the “Camera Setup” or “Add Camera” option.
- Select “Wireless Camera” from the list.
- Follow the prompts to add your camera. You may need to enter the camera’s ID or IP address.
Step 5: Test the Camera
Once added, it’s time to test the camera:
- Go back to the main menu on your DVR.
- Select the camera view option. You should see the feed from your new camera.
- Check the video quality. Make sure it’s clear and smooth.
- Move around in front of the camera. Check if it detects motion.
Troubleshooting Tips
If you cannot see the camera feed, don’t worry. Here are some tips to help:
- Make sure the camera is powered on.
- Check if the camera is connected to Wi-Fi.
- Restart both the camera and the DVR.
- Ensure the camera is within range of your router.
Final Thoughts
Adding a wireless camera to your Lorex DVR is easy. Just follow these steps, and you will be set up in no time. Remember to keep your software updated. This helps improve security and features.
With your new camera, you can keep an eye on your home. You can feel safe and secure. If you have any questions, check the manual or visit the Lorex website for support.
Frequently Asked Questions
1. Can I Connect More Than One Wireless Camera?
Yes, you can connect multiple cameras. Just follow the same steps for each camera.
2. What Should I Do If The Camera Won’t Connect?
Check your Wi-Fi connection. Make sure the camera is in range.
3. Do I Need Special Software For The Dvr?
No, the DVR should have all necessary software. Make sure it’s updated.
4. Can I View The Camera Feed On My Phone?
Yes, if your camera has a mobile app, you can view it on your phone.
5. What If The Video Quality Is Poor?
Check your Wi-Fi signal. A weak signal can cause poor video.
By following this guide, you will easily add a wireless camera to your Lorex DVR. Stay safe and enjoy your new security setup!
Frequently Asked Questions
How Do I Connect A Wireless Camera To Lorex Dvr?
To connect, use the DVR’s menu. Choose ‘Add Camera’ and follow the prompts.
What Models Of Lorex Dvr Support Wireless Cameras?
Most Lorex DVRs support wireless cameras. Check your model’s manual for details.
Can I Add Multiple Wireless Cameras To Lorex Dvr?
Yes, you can add multiple wireless cameras. Ensure they are compatible with your DVR.
Do I Need Special Software For Adding Cameras?
No special software is needed. Use the DVR’s built-in menu to add cameras.