Setting up a camera with your Lorex NVR is easy. This guide will help you connect your camera. Follow these simple steps. You will learn how to add a camera to your Lorex NVR.
What is Lorex NVR?
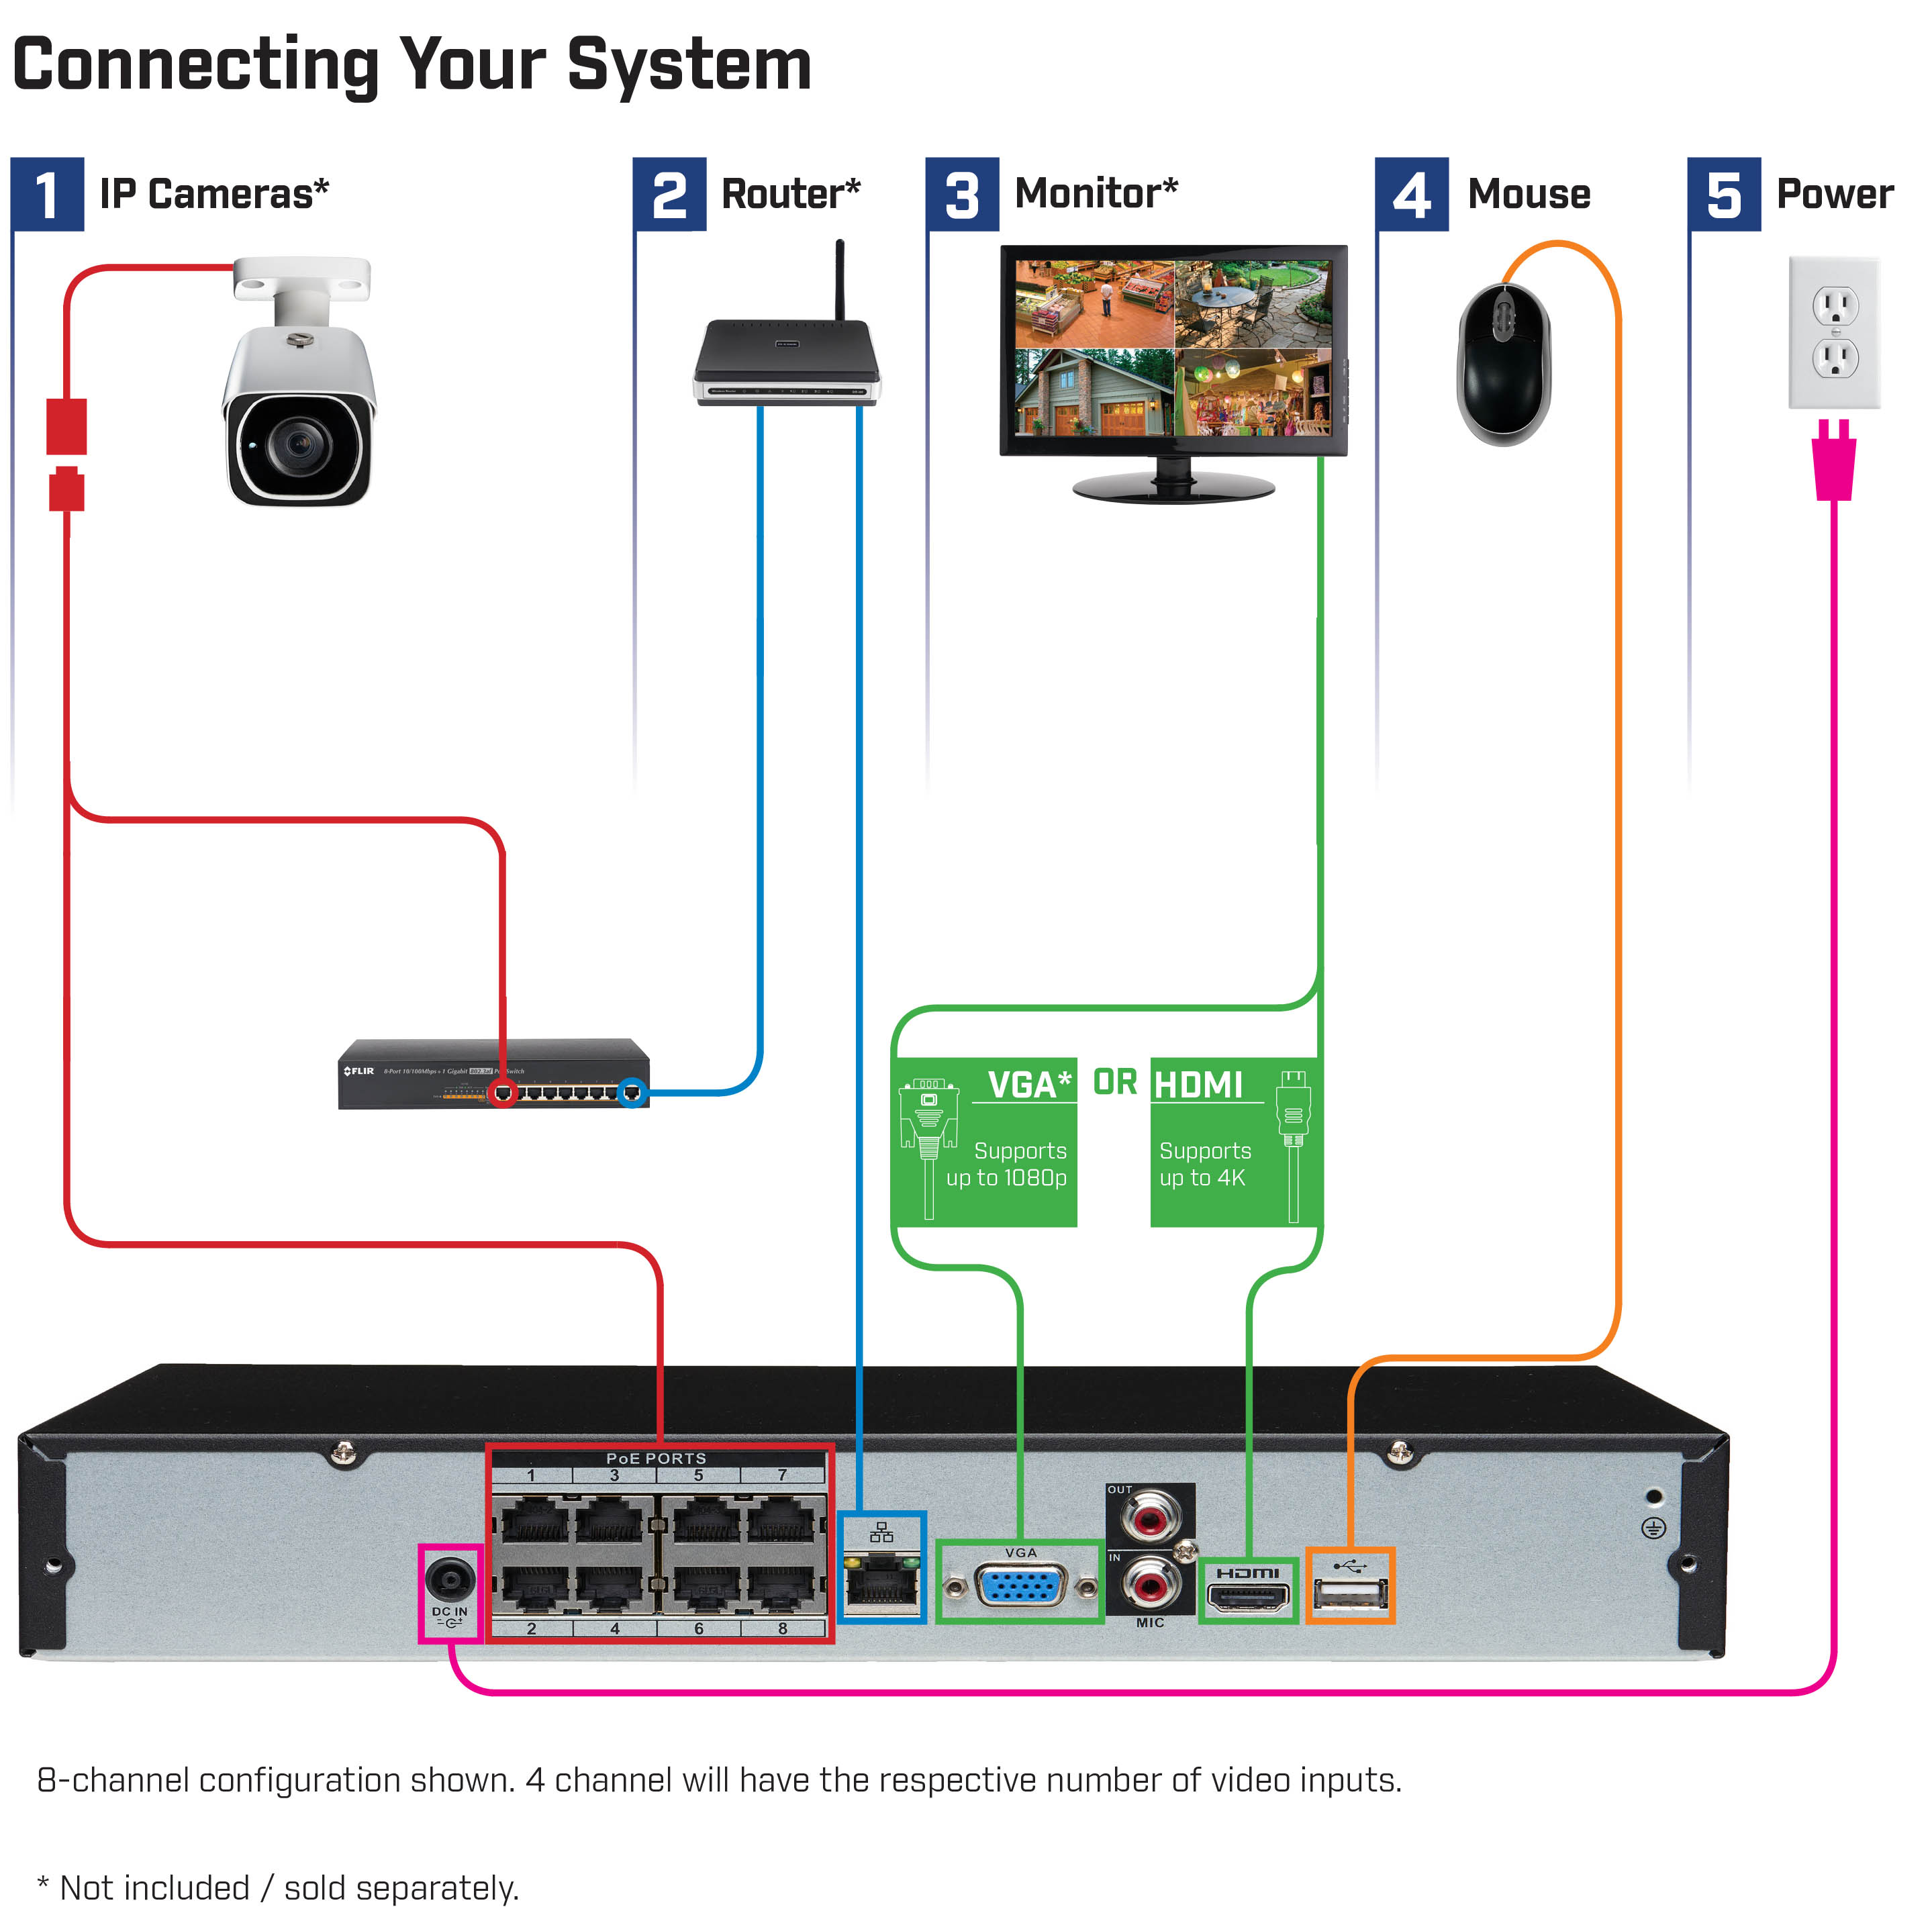
A Lorex NVR is a network video recorder. It stores video from your cameras. NVRs can manage multiple cameras at once. They help you keep your home or business safe.
Why Add a Camera?
Adding a camera improves security. You can monitor your property. Cameras can help you see who is near your home. They can also record events for later review.
What You Need
Before you start, gather these items:
- Your Lorex NVR
- IP camera (compatible with Lorex)
- Ethernet cable
- Power supply for the camera
- Computer or mobile device
Step-by-Step Guide
Step 1: Connect Your Camera
First, connect your camera to power. Use the power supply. Next, connect the camera to your network.
- Use an Ethernet cable.
- Plug one end into the camera.
- Plug the other end into the NVR.
Step 2: Power On Your Nvr
Now, turn on your Lorex NVR. Wait for it to start up. This may take a few minutes. Make sure it is fully powered on.
Step 3: Access The Nvr Menu
Use a computer or mobile device to access the NVR. You can do this through a web browser. Type in the NVR’s IP address. You can find this in the manual.
Step 4: Log In
Log in with your username and password. If you have not changed it, the default is usually “admin” for the username. The password is often “123456.” Check your manual for specifics.
Step 5: Go To Camera Settings
Once logged in, find the “Camera” settings. Look for an option like “Add Camera.” This is usually in the main menu.
Step 6: Add The Camera
Click “Add Camera.” The NVR will search for cameras on the network. If your camera is connected, it should appear here.
Step 7: Select Your Camera
Choose your camera from the list. Click on it to select. Then, click “Add” or “OK.” This saves the settings.
Step 8: Configure Camera Settings
Next, configure the camera settings. Set the name for your camera. Choose the recording type. You can select continuous or motion detection.
Step 9: Save Changes
Don’t forget to save your changes. There should be a “Save” button. Click it to ensure your settings are stored.
Step 10: Test Your Camera
Finally, test your camera. Go to the live view option. Check if the camera shows a video feed. If it does, you have successfully added your camera!
Troubleshooting Tips
If you have problems, try these tips:
- Check the power connection to your camera.
- Ensure the Ethernet cable is securely plugged in.
- Restart the NVR and camera.
- Check your network settings on the NVR.

Frequently Asked Questions
How Do I Connect A Camera To My Lorex Nvr?
To connect a camera, use an Ethernet cable. Plug one end into the camera and the other into the NVR.
What Type Of Camera Works With Lorex Nvr?
Lorex IP cameras are compatible with Lorex NVRs. Check specifications before purchasing.
Can I Add Multiple Cameras To Lorex Nvr?
Yes, you can add multiple cameras. Ensure your NVR supports the number of cameras you want.
What Should I Do If My Camera Is Not Detected?
Check the Ethernet connection and power supply. Restart both the camera and NVR.
Conclusion
Adding a camera to your Lorex NVR is straightforward. Follow the steps in this guide. Soon, you will have your camera set up.
Remember to regularly check your camera feed. This helps keep your home or business secure. If you follow these steps, you will have no trouble. Enjoy your new security setup!
Frequently Asked Questions
Can I Add Multiple Cameras To My Lorex Nvr?
Yes, you can add many cameras. Just follow the steps for each one.
Do I Need Special Cameras For My Lorex Nvr?
Yes, use cameras that are compatible with Lorex NVRs.
What If My Camera Does Not Show Up?
Check the connection and restart the devices. Make sure the camera is powered.
Can I Access My Cameras Remotely?
Yes, you can access your cameras from anywhere. Use the Lorex app or web portal.
What Is The Best Placement For My Camera?
Place your camera where it can see the area you want to monitor. Avoid obstructions.