Installing a Lorex security camera is a smart choice. It helps keep your home safe. This guide will help you wire your Lorex camera step by step. You will learn what tools you need and how to connect everything correctly.
What You Need
Before you start, gather these items:
- Lorex security camera
- Power adapter
- Coaxial cable or Ethernet cable
- Drill and drill bits
- Screwdriver
- Mounting screws
- Level
- Wire cutters
- Electrical tape
- Safety goggles
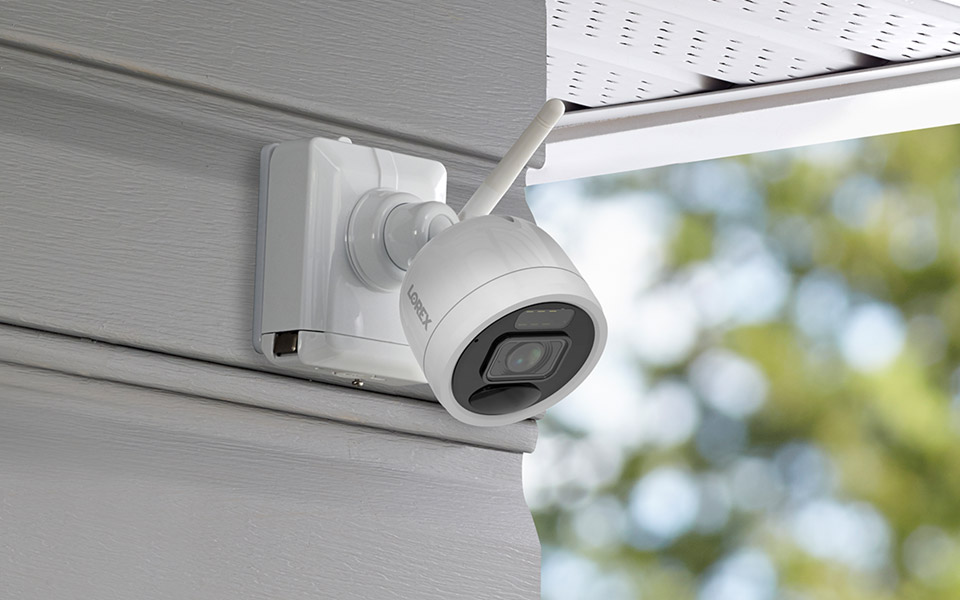
Step 1: Choose a Location
Find a good spot for your camera. Here are some tips:
- Mount it high for a better view.
- Avoid places with too much light.
- Make sure it covers the area you want to watch.
Step 2: Drill Holes for Mounting
Once you find the right spot, it’s time to drill. Follow these steps:
- Use a level to mark where to drill.
- Wear safety goggles to protect your eyes.
- Drill holes for the mounting screws.
Step 3: Connect the Cables
Now, it’s time to connect the cables. Here’s how:
- If using a coaxial cable, connect it to the camera.
- If using an Ethernet cable, connect it to the camera.
- Run the cable to your DVR or NVR.
- Make sure there are no sharp bends in the cable.
Step 4: Attach the Camera
Now it’s time to attach the camera. Do this carefully:
- Align the camera with the drilled holes.
- Use the screws to secure the camera in place.
- Ensure it is tight and secure.
Step 5: Connect the Power Supply
Your camera needs power. Follow these steps:
- Connect the power adapter to the camera.
- Plug the other end into an electrical outlet.
- Make sure the camera is getting power.
Step 6: Test the Camera
Before finishing, you must test the camera:
- Check the video feed on your DVR or NVR.
- Make sure the image is clear.
- Adjust the camera angle if needed.
Step 7: Secure the Cables
Now that everything works, secure the cables:
- Use electrical tape to hold the cables in place.
- Make sure they are not in the way.
- Keep them safe from damage.
Step 8: Final Checks
Before you finish, do some final checks:
- Ensure all connections are tight.
- Check the camera’s view again.
- Make sure everything is secure and safe.
Tips for Better Security
Here are some helpful tips:
- Regularly check your camera’s view.
- Update the camera’s software when needed.
- Keep the camera clean for clear images.
Frequently Asked Questions
How Do I Connect My Lorex Security Camera?
To connect your Lorex security camera, use the provided power and video cables. Plug them into the camera and your DVR.
What Tools Do I Need To Wire A Lorex Camera?
You need a screwdriver, wire cutters, and a drill. These will help with mounting and connecting the camera.
Can I Use A Lorex Camera Without A Dvr?
Yes, some Lorex cameras can work with a mobile app or a cloud service. Check the model specifications for details.
How Long Can The Cable Be For Lorex Cameras?
The cable can be up to 300 feet long. Beyond that, video quality may decrease.
Conclusion
Wiring your Lorex security camera is easy. Follow these steps carefully. Soon, you will have a working camera to help protect your home. Always ensure your camera is secure and connected properly. Regular checks will keep it working well. Enjoy the peace of mind a security camera offers.
Frequently Asked Questions
1. What If My Camera Does Not Turn On?
Check the power connection. Ensure the adapter is plugged in. Make sure the outlet is working.
2. Can I Use A Longer Cable?
Yes, but ensure it is the right type. Longer cables may reduce video quality.
3. How Do I Adjust The Camera Angle?
Loosen the screws slightly. Adjust the angle, then tighten the screws.
4. Is It Safe To Drill Into My Wall?
Be careful. Check for wires or pipes inside the wall. Use a stud finder if needed.
5. What Should I Do If I Forget My Password?
Use the reset option on your DVR or NVR. Follow the instructions in the manual.
Remember
With some tools and patience, wiring a Lorex camera is simple. Make sure to follow safety precautions. Enjoy the security and safety that comes with your new camera.